Spring Cleaning List
Nick Dragonetti • Jan 09, 2020

It won’t be long until warmer weather brings back new buds, green grass and birds singing in the trees, so it's time to consider when to start your spring cleaning. It’s wise to start thinking about your spring-cleaning checklist now because a spring clean is different than the usual tidying up you do regularly.

A spring clean results in a deep-cleaned house which makes that routine cleaning easier and more efficient. A spring clean means going room by room cleaning and de-cluttering so that our homes are fresher and more organized.

When to Start Spring Cleaning

The first early days of warm weather are the best time to start spring cleaning. It's essential you air out rooms that have been closed up throughout the winter. As part of your cleaning efforts, you want to bring in fresh air into your home to refresh things like your mattresses, your laundry room and your bathroom.

In the New York City area, spring normally starts towards the end of March and early April, when the Yankees and Mets begin playing baseball. In fact, the start of baseball season is a great time to start spring cleaning. Days may still be a bit cool, but they are warmer. We all have a little more energy when spring comes, so it’s a great time to grab your spring-cleaning tools and get to work.

To do a thorough spring cleaning, don’t try to do it all in one weekend. You will only get tired and frustrated. Our spring-cleaning checklist stretches over four weekends with each weekend dedicated to a particular section of your home. Focusing all your energy and time on doing that cleaning one day on the weekend will give you both the satisfaction of a job well done and the impetus to move on to the next area the following weekend.

Before we get started, here are a couple of quick tips to use in every room of your house:

  • Clean from top to bottom so that you won’t be knocking dust and dirt on a surface that you’ve already cleaned.
  • Work from left to right.

So what you want to do is work on one section of each room, starting at the top left and working to the bottom right. This will help you keep track of the areas that you’ve already cleaned.

First Weekend: Spring Clean the Kitchen

Required materials:

  • Four boxes marked “donate,” “trash,” “recycle” and “elsewhere”
  • A duster with a long handle
  • A stepping stool or small ladder
  • Microfiber cleaning cloth — microfiber doesn't leave lint behind
  • Baking soda
  • Empty spray bottle
  • Antibacterial spray
  • Cooler
  • All-purpose cleaner
  • Cleaners for your floor, glass and oven
  • Rubber gloves

1. Start With a Clean Slate

Do the dishes if they are dirty. Tidy up the room as much as possible by putting items that should not be in the kitchen into one of the four boxes. If you have not used any kitchen item for more than a year, donate it.

2. Clean the Refrigerator

Take everything out of the fridge and freezer and place these contents in a cooler. Unplug your refrigerator or turn it off. It’s best to clean when the shelves inside are at room temperature. If you try to do it before that, hot water may crack the cold shelves. Meanwhile, prepare a mixture of one quart of hot water and two or three tablespoons of baking soda.

When the shelves have reached room temperature, remove them and use this mixture to clean the shelves in the kitchen sink. Wash, rinse and dry them, then set them aside. Now use that same mixture or your all-purpose cleaner and wipe out the inside of the refrigerator and freezer.

Don’t forget the door seals. Use a little dishwashing liquid and some warm water on the seals to make sure you get out any debris. Make sure you dry them very well. Once you have dried the refrigerator and the freezer, return the shelves and the contents then turn the fridge back on.

3. Clean Your Cabinets and Shelves

Remember to start at the top and work your way down. The tops of your cabinets and even your fridge could have a lot of dust or grease that has accumulated over the year. Use dishwashing liquid in warm water.

Take all the items out of the shelves and the drawers and clean the insides using warm water and dishwashing liquid. Dry them and return contents.

4. Clean the Windows and Screens

Mix two teaspoons of liquid soap, two cups of water and about a quarter-cup of white vinegar in a spray bottle. Spray onto the glass and then use old newspaper to clean it. The ink on the paper is a mild abrasive and gives you a streak-free clean.

To clean your window screens, put a little warm water and soap on a carpet remnant and gently wash the screens. This will remove much of the dirt and grime attached to your screens.

5. Clean the Kitchen Appliances

If you have stove grates, remove them and use soapy steel wool pads to get them clean. Then clean the oven.

For a ceramic top, use wet dryer sheets to remove burnt on grime and food residue. Let the wet dryer sheet sit on the top of the stove for about 15 to 20 minutes before you wash the top with warm water and dishwashing soap.

6. Clean Toasters and Other Appliances

To return the original shine to kitchen appliances, mix together a tablespoon of cream of Tartar and enough water to make a slightly milky paste. Then rub this into your stainless steel appliances. Use a white cloth to wipe the paste away, and you’ll see the shine back again.

7. Clean the Trash Can

Take your trash can outside and scrub it with clean soapy water. Rinse and let it dry in the sun. Before you return it to your kitchen, douse it with antibacterial spray.

Second Weekend: Spring Clean the Bedrooms

Required materials:

  • Four boxes marked “donate,” “trash,” “recycle” and “elsewhere”
  • Duster with a long handle
  • Furniture polish
  • Microfiber cleaning cloth
  • Vacuum cleaner with all attachments

1. De-Clutter

Take all the items that don’t belong in the bedroom and put them in one of the four boxes. Clean up any trash in the room including anything under the bed or nightstand and put it in the trash box.

2. Take Down Curtains and Remove Linens

If your bedroom has curtains or drapes, remove them to have them washed or dry cleaned. Take all the sheets off your bed including your pillowcases and wash them.

3. Dust

Remember top to bottom, left to right.

Start with the ceiling fan if you have one. Use a long-handled duster to clean it. If you’re still having a problem, try taking an old sock and wrapping it around the duster to see if you can remove any more grime or dirt from the fan that way.

Remove anything from the walls and put them on the bed.

Starting at the entrance, dust the ceiling, the windows, the moldings around the windows and the doors, the walls and the baseboards. One way to get rid of dust or cobwebs on the ceiling is to wrap a pillowcase around a broom and use it to clean hard-to-reach places.

Dust the artwork or photos and rehang them on the walls.

4. Clean Windows and Screens

Open the windows and remove the screens if possible. As explained in the kitchen section, clean the screens using a carpet remnant and the windows using newspaper.

5. Use Furniture Polish on Your Dressers and Nightstand

Before you polish, it's a great time to try to cover over any scratches on the furniture.

6. Flip the Mattress Over

First, vacuum the top of your mattress with your upholstery attachment. Flip mattress and vacuum the new top and the sides.

7. Vacuum

Be thorough. If you can, move the furniture so you can clean underneath. Use the vacuum’s floor attachment to get under the bed. Try the crevice attachment at the base of the walls. Now vacuum the entire floor.

8. Throw Open the Windows

If it’s still a bit cool outside, keep it to about half an hour. If it’s warmer, you can leave the windows open for up to three hours.

Third Weekend: Spring Clean the Living Room

Required materials:

  • Four boxes marked “donate,” “trash,” “recycle” and “elsewhere”
  • Duster with a long handle
  • Microfiber cleaning cloth
  • Furniture polish
  • Broom
  • Can of compressed air
  • Vacuum with all the attachments

1. De-Clutter

As you have done in the previous two rooms, take everything that does not belong in the living room and place it in one of the four boxes. This is a great time to gather books to donate to your local library. Put old magazines in the recycle box. Get any trash from underneath the furniture and put it in the trash box.

2. Take Down Curtains or Drapes

Again, take down the curtains or the drapes to have them washed or dry cleaned.

3. Dust

Top to bottom, left to right.

As you did in the bedroom, dust the ceiling fan with the long-handled duster.

Take down all the artwork and pictures, and put them on the couch.

Dust the room starting with the ceiling, the corners, the window frames and windowsills and finally the baseboards.

With the clean microfiber cloth, clean the artwork and the pictures and then return them to the walls.

4. Clean the Furniture

Take all the pillows and cushions outside, give them a good beating and let them air out.

Use the upholstery attachment on the vacuum and clean the sofa and the chairs. Don't forget the sides and the back. Use the crevice attachment and get in between the side of the cushions and into the backs of the furniture.

5. Clean and Polish the Furniture

Use your all-purpose cleaner to remove gunk from your furniture. Dry and polish it.

6. Clean Windows and Screens

Use the clean methods recommended above to clean the screens and windows.

7. Clean and Dust Electronics

Spray the compressed air into the crevices of all of your electronics. Then use a microfiber cloth to clean DVD players, stereos, computers, televisions and other electronics. Make sure you wipe away from the ventilation area. The last thing you want to do is push dust into your machines.

8. Vacuum

Using the dusting attachment, clean your lampshades.

For the base of the walls and any heavy furniture, use the crevice attachment.

Vacuum the floors. If you have hardwood floors, hopefully you have pads under your furniture that makes it easy to move. As you vacuum, move each piece of furniture to the side or pull it out so that you can vacuum the entire room.

Fourth Weekend: Spring Clean the Garage

Some people may argue that it’s best to start with the hardest task and would advise you to begin your spring cleaning with your garage, but there’s something to be said for leaving it until last and knowing that when it is done, all your spring cleaning chores are finished.

Required materials:

  • Four boxes marked “donate,” “trash,” “recycle” and “elsewhere”
  • A good pair of work gloves — there may be materials in your garage you do not want on your skin
  • A broom
  • A ladder or a step stool
  • Microfiber cleaning cloth
  • All-purpose cleaner

1. De-Clutter

Let’s face it, most of our garages are disaster areas. It’s probably best to move everything out onto the driveway, which means making sure you have good weather.

This will make it easier to decide what needs to go into each of the four boxes. If you have any hazardous waste to dispose of, put those to the side.

2. Clean

Once again, top to bottom and left to right. Use your broom to clean the ceilings the corners and the walls, keeping a close eye for cobwebs and other bits of loose hanging dirt. It’s a good idea to close the garage door and clean it. If the floor is covered with oil spots, use a little liquid detergent in hot water to scrub it. Sometimes you will need to get down on your hands and knees and use a stiff bristle brush to get rid those spots. If you can, hose out your garage starting at the back and working towards the front. You want the floor clean before you bring things back in.

3. Determine Where Things Should Go

Most of us use our garages for a variety of purposes. The key to a clean garage is organization. Think about the ways you want to organize the materials that need to go back into the garage. Do you want to have a work area? Is there space for storing your holiday decorations? Do you have a lot of sports equipment that you use regularly? Keep these items together, and it will become much easier to find them when you need them.

If you can, use vertical storage shelves. This is much better than storing things on the floor. It helps to use all the space in your garage, and it means that if there is a flood, your belongings won’t be ruined. It will also help you keep your floors cleaner throughout the year.

As you store materials, especially boxes, make sure you label what's inside. You don’t want to search through a year's worth of decorations to find the ones you want.

Spring Cleaning Hacks

If you follow the suggestions above, you can clean most of the areas of your home in a few short weeks. But here are a few other suggestions you may find useful as you clean:

  • Take those water stains off your faucet with a lemon. Rub a half a lemon on the water stains. The citric acid works well on hard water marks.
  • To get rid of lime buildup around the faucet, cover it with a paper towel and soaked with vinegar. Let that vinegar set for about an hour. This will loosen the deposit and make it easier to remove.
  • Use the other half of that lemon to clean the microwave. Squeeze the juice of half a lemon into half a cup of water. Toss in the lemon rinds as well. Put on a high in the microwave for three minutes, then let it stand for a few minutes. Don’t open the door. This will help loosen all the grime in the microwave so you can easily wipe down the inside.
  • Clean your stainless steel sink with baking powder. Simply wet your sink, sprinkle the baking powder and scrub. If you need a little more scrubbing power, add some salt of the baking soda.
  • Use coffee filters on your electronics. Coffee filters are gentle enough to wipe away fingerprints, smudges and dust as long as you don't press too hard.
  • Use a window squeegee for pet hair on your rug. This spring-cleaning hack works incredibly well. You might be surprised how much pet hair a squeegee will bring up from your rug or your carpet and then you can just vacuum it away.
  • In hard-to-reach places, put a towel on a broom. If a long-handled duster won’t reach far away corners of the ceiling, wrap a towel around a broom and secure with an elastic band. Then you can reach the dust and cobwebs that need to be cleaned away.
  • Don’t throw away those old socks. They make great dusting mitts. You can use them to polish the furniture in your bedroom or in your living room.

When You Need a Residential Dumpster, Contact D.B. Container Services

As you spring clean, you will likely discover that you need to throw away a lot of trash and old junk. But you don’t want to pile everything in front of your home or in your driveway. D.B. Containers has the perfect solution. We offer a 10-yard container ideal for residential purposes. We drop it off, you fill it up, and we take it away. We also offer larger size containers for heavier jobs.

To learn more about our line of containers, call us at 718-257-2300. You can also request a free quote online and a member of our team will get back to you soon as possible to help you with your selection.
By Nick Dragonetti 09 Apr, 2021
Every construction project has one thing in common: waste. Whether you're doing renovations on your home or business, or you're clearing out a basement or another space, there's going to be a lot of trash you have to deal with. There's a high chance you're going to be needing a roll-off dumpster to contain all that garbage — but there is a right and wrong way to fill it. Renting a dumpster is convenient because the company delivers it and picks it up. All you have to do is fill it. Loading a dumpster correctly can save you time and money, so make sure you know your gameplan before you rent one.
By Nick Dragonetti 31 Mar, 2021
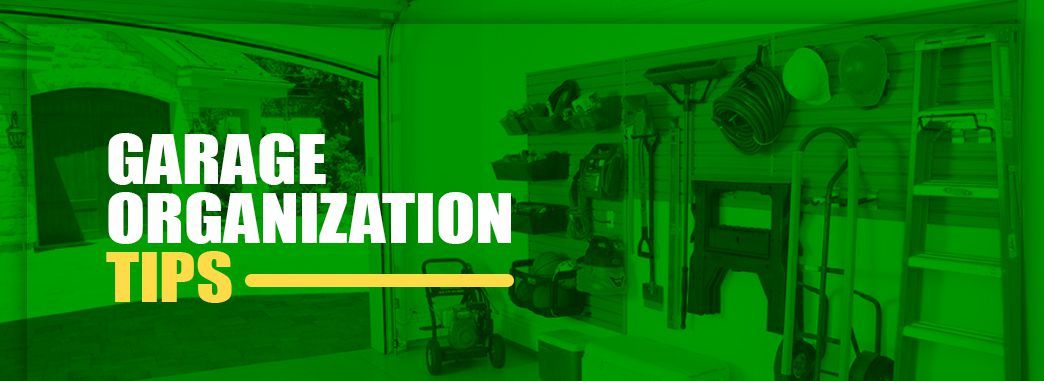
Do you wish your garage was clean, organized and used for more than miscellaneous storage? Many homeowners want to improve their current garage space. A majority of Americans spend a few hours each week in their garage engaging in activities but for many others, clutter and excess storage prevent them from using their garage to its full potential. D.B. Containers is the trusted dumpster rental service for New York City residents to organize and discard the clutter that's been stored in their garage for too long. We realize that cleaning and organizing even the smallest garages can be a huge undertaking which is why we've gathered a list of tips that will help you thoroughly clean and organize your garage while suggesting ways to keep your clutter to a minimum. When Is the Best Time to Clean and Organize Your Garage?
By Nick Dragonetti 11 Mar, 2021
If you undertake a significant home improvement project, whether it's a remodel or demolition, you'll quickly realize you need a way to dispose of all the resulting debris. You'll either have to use hundreds of trash bags — which may not even accommodate larger pieces of debris — or you can rent a large, sturdy dumpster that can easily be hauled away once your project is finished. While renting a dumpster may be a no-brainer for your situation, figuring out the size of the dumpster you need is not always as easy. In the guide below, we'll discuss the most common sizes for dumpsters and provide some tips on how to pick the best one for your project. 
By Nick Dragonetti 27 Jan, 2021
Many people tend to treat a dumpster like a garbage disposal — anything that isn't going to break it is going into it. In 2017, the United States generated 267 million pounds of municipal solid waste, including garbage, recycling and compost. Though much of that waste comes from household garbage, a lot comes from residential, commercial and contractors' dumpsters as well. But many items are prohibited in roll off dumpsters — or if they are not banned outright, they are accepted only with the payment of additional fees. What cannot go in a dumpster? The answer likely varies depending on where you live and your city's local regulations. But a few items are generally prohibited in all dumpsters, and it's important to be aware of these. Below, we'll discuss why some items cannot be thrown away in dumpsters, list some common items that cannot go into dumpsters, and answer some common questions about what is not allowed in a dumpster, what you can put in a dumpster, and what may be allowed for an extra fee. Why Should Some Items Not Go Into Dumpsters?
By Nick Dragonetti 31 Aug, 2020
What Can I Recycle? Making the most of materials through recycling is a noble practice, but are you putting the right items into your bin? Many people are unaware of the specifications for recycling, which leads to mishaps and setbacks for facilities — not to mention bad news for the environment. Misplaced items in recycling bins are a widespread problem. The average contamination rate — how many non-recyclables taint recycling batches — for communities and businesses is approximately 25 percent . Mistakes in recycling are easy to make, but they're also easy to fix with a helpful guide. If you've been wondering, "What can I recycle and what doesn't meet the standards?" this resource can give you an answer. Benefits of Recycling Your thoughts on recycling are probably different from those of some of your friends and family members, as most Americans have differing opinions about it. These Americans also have different influences and levels of access. For every 10 Americans, about three of them say their community strongly encourages recycling. There are significant, real advantages to recycling and re-using that everyone should know so that the number can reach 10. In the long run, recycling is a beneficial endeavor that can transform your community and the earth. Check out these reasons that you should get involved in recycling. 1. Reduce Landfill Buildup Unwanted materials have been thrown away in remote spots for centuries, but the space for landfills is quickly diminishing. Unfortunately, land isn't unlimited, and the capacity of existing landfills is shrinking.
By Nick Dragonetti 31 Aug, 2020
The United States generates unbelievable quantities of municipal waste every year. The latest figures from the U.S. Environmental Protection Agency (EPA) show that the United States generates 267.8 million tons of municipal solid waste a year, or about 4.5 pounds of waste per person every day. And of course, all those tons of solid waste can have a devastating effect on the environment. Municipal solid waste landfills are the third-largest source of methane emissions — which contribute to the greenhouse effect — in the United States, accounting for 16% of such emissions. Pollution, fossil fuel burning and other greenhouse gas emissions are associated with excess waste as well. What are some ways to reduce the amount of waste in your home? Fortunately, households have a variety of options — the familiar injunction to "reduce, reuse, recycle" is excellent advice to start with. Below, we'll elaborate on some ways to reduce household waste and how to get started incorporating those strategies into your daily life. Benefits of Reducing Your Household Waste
By Nick Dragonetti 24 Aug, 2020
Whether you're renovating a room or your whole home, you should plan your steps to remodeling a house before you begin. Creating a home renovation checklist can be exciting as long as you remember to be flexible and patient during any surprises or delays. Use this guide to learn how to plan your home renovation. Build a Project Plan Before you start your project, you need a plan on how to renovate the house. Since a remodel is a complex undertaking, be patient and take several months to consider all the details so you can create one that works for you and your family. Lay out how you want your house to look on a simple piece of paper or blueprints. Ask yourself these questions to help you brainstorm: What do I want to change? After you've lived in your house for several years, you probably have some elements you'd love to change. Design is a crucial component of remodeling your home, and you might need to be a little creative. While thinking about what you want, consider the comfort, privacy and visual appeal of your living space. What do I need to update? Besides the aesthetic design or convenience of your home, you also should consider the safety and functionality features of the space. Knowing what you want and need will help determine where you can save money and splurge. What am I allowed to do? You'll need permits to renovate your house so your project will be up to code according to the zoning regulations in your area. What will my life look like in the next 10 years? Your new bathroom or kitchen could last you several decades before you need to update it. During that time, your family could expand or change. Consider your future as you think about how to plan your home renovation. Do I want to sell the house? If you want to sell your house soon, focus on attracting prospective buyers instead of accommodating your design and comfort preferences. Consider which projects and details would increase your property's resale value. Create a Renovation Project Budget After you've decided what you want to do, you can create a realistic budget. You should make sure you're able to afford your home renovation before you take on the project so you don't run out of money. Decide on a number you're willing to spend and try to stick to it as you order materials and hire a contractor. Consider these factors when creating your budget: The source of the money: You could either pay for the renovation with cash, take out a loan from the bank or use a credit card. Keep in mind that contractors often charge fees if you choose to finance. Where your money is going: When you hire a professional, they order the permits, install your building materials and complete the details of your remodel. They might also dispose of the waste from your previous home components and use specialized equipment to make your living space look updated and clean. Unexpected costs: You often run into surprises when you renovate a house, especially if you live in an old house. If your contractor finds problems in the area, you'll have to pay extra money to fix them. Put a buffer in your budget for these unanticipated expenses.
By Nick Dragonetti 15 Jul, 2020
Both indoor and outdoor construction jobs can leave behind a lot of waste. Common site waste includes wood, nails, plaster, stone, dirt, brush and hazardous materials like paint stripper and some types of insulation. While post-construction cleaning might seem like a daunting task, there are some tips you can follow to make the process go quickly. Tips for Cleaning up After Construction Projects The key to safe and efficient construction site cleanup is to separate the project into individual tasks and take them one at a time. Remember to wear gloves, face masks, goggles and closed-toe footwear while cleaning to minimize the chance of injury. If you're cleaning up after a large-scale project, you may need to clean some things more than once to ensure the desired level of sanitation. Here are some post-construction cleaning tips to help you break things down into manageable tasks: 1. Clean the Air Purifying the air at your construction site is essential for your health and well-being. Construction site dust is filled with hazardous debris, including crystalline silica. Crystalline silica is a natural mineral substance created from crushing stone, rock, bricks, concrete and similar materials. When inhaled, crystalline silica can lead to lung and kidney disease, chronic obstructive pulmonary disease (COPD) or cancer. The best way to protect yourself from these particles is to wear protective gear, purify the air with an air purifier and promptly change all indoor air filters. Make sure air vents are clear of any debris, dust and obstructions. 2. Sweep and Vacuum the Floors
By Nick Dragonetti 21 Feb, 2020
If you have decided to rent a dumpster for your home project or contracting or commercial needs, you may feel overwhelmed with questions. How do you rent a dumpster? When should you rent one? How big of a dumpster do you need? Our team of hardworking experts is here to help. Read on to learn the answers to these questions and get some helpful tips for renting a dumpster. How to Rent a Dumpster Use the following guide to navigate through the dumpster rental process: Determine the scope of your project and calculate the needed size of your dumpster rental. Contact a reputable container service with positive customer testimonials and proven success. Clear the space needed for your dumpster rental. Create a plan for filling your container. Load carefully and with purpose — stick to the plan. This will keep you safe and help the process go smoothly. Contact your container company if your dumpster needs emptied and brought back, or when you are finished using it. Tips for Renting a Dumpster Now that you know the steps needed for successful dumpster rental, here are a few tips to keep in mind: Place your dumpster on level ground. Use a ramp when necessary. You can construct one using plywood and cinder blocks. Avoid overfilling your dumpster. This is a safety hazard and could result in additional fees. Use a wheelbarrow to make the loading process faster and safer. Recycle materials when you can . This is good for the environment and economy and can give you more space in your dumpster container for non-recyclable materials. Making the Most of Your Dumpster Rental Plan how you will fill your dumpster . You will find you have much more space to work with — and a much easier time loading — if you figure out your gameplan ahead of time. Understand how to layer the items in your dumpster for maximum efficiency. Set aside things that cannot be thrown away. Decide the exact location you will place your dumpster container and let your neighbors know to expect its arrival if necessary. Decide if more than one emptying trip will be needed. Sometimes, you end up needing to haul away more than you anticipated. Keep an eye on the level of your dumpster and make adjustments as needed. Keep your dumpster's weight limit in mind as well as the length of the rental period. This information will be provided to you. Keeping these numbers in mind will help you avoid incurring additional costs. If possible, have your materials prepared for throw-away before your rental shows up. This way, the process can go as quickly and efficiently as possible and you have a clear picture of the amount of space you will use. Prepare your space for the dumpster before its arrival. This includes measuring the distance from the debris to the dumpster. Plan to place your dumpster on level ground as close to your waste as possible to minimize trips back and forth. As a courtesy — and to avoid having to move your dumpster more than once — be sure your dumpster is not blocking any parked cars, traffic or entrances to homes or businesses. Common Dumpster Rental Questions Have a question about dumpster rental? Keep reading to find answers to some commonly asked questions. What Size Dumpster Do I Need? D.B. Container Service offers 10, 15, 20 and 30-yard dumpster rental options . These dumpster sizes are ideal for the following kinds of projects: 10-yard dumpster rentals: Our 10-yard containers are the ideal size for cleaning out a one-car garage, a small room remodeling project or general spring cleaning around your home. 15-yard dumpster rentals: These can handle the contents of a two-car garage, a large room interior or exterior remodeling project or items from basement decluttering. 20-yard dumpster rentals: 20-yard rentals are suitable for roofing debris, siding, deck removal or basement renovation. 30-yard dumpster rentals: These are best for new construction projects, whole house renovations, commercial clean up and more. If you are still unsure of what size dumpster your project or business needs, give our experts a call at 718-257-2300. We are happy to help you make the best choice. How Much Does It Cost to Rent a Dumpster?
By Nick Dragonetti 08 Jan, 2020
For most of us, recycling around the holidays is almost second nature. Recycling as much as we can is environmentally and socially responsible. The holiday season is about giving back to our friends, family and community, and recycling discarded materials and objects is a way to "give back" to the environment. Unfortunately, while our intentions are good, recycling holiday materials is not as simple as it sounds. In fact, many of us do more harm than good when we stuff our festive wrapping paper and curling ribbons into a blue bin. Every year, Americans unintentionally wreak havoc on local and international recycling centers by putting un-recyclable items in their blue bins. Since Americans produce 25 percent more waste than normal between Thanksgiving and New Year's Day, this leaves a lot of room for mistakes. Poor recycling habits affect more than our local recycling centers — the United States ships much of its recycling overseas for repurposing, and these countries are increasingly wary of accepting our materials due to bad quality. This holiday season, be informed about your recycling. Whether you are dealing with glittery bows, foil wrapping paper or regal Christmas trees, this guide will help you know which decorations to recycle, which to reuse and which to toss in the trash. Holiday Recycling Tips
Share by: